
Welcome to our team blog hop. This month we wanted to celebrate back to school by doing a little teaching of our own. Each consultant in this blog hop will be sharing some of their stamping/crafting knowledge with you. You don't want to miss any of this fun learning, so make sure you get a chance to visit everyone's "blog classroom".
If you have just hopped onto my blog, you can start here as this is a circular hop. If you came from Darcel's Blog then you are in the right place! from here you can hop on over to Michelle's Blog to learn how to make a shaker card.
The technique that I wanted to share with you is using random stamping to create your own pattern paper.
I love doing this technique - it creates patterned paper that is completely unique to your layout or card. And it really is easy - the trick is not to over-think it (it is not supposed to be perfect).
Here is a picture of a two page scrapbook layout using the stamped pattern paper, along with some of the great papers from the new Seaside Collection.

I stared by gathering the ink colours that are suggested to co-ordinate with the Seaside Paper Pack and Champagne Cardstock as my background. For this project I picked the new Treasured Friendship stamp set (C1594)


 When random stamping, it is best to always start with the
largest stamps first and fill in spaces with the smaller images as you
go.
When random stamping, it is best to always start with the
largest stamps first and fill in spaces with the smaller images as you
go.I started with the Dessert Sand Ink and one of the larger shell stamps.
Stamps should be randomly placed around the page. Keeping a triangular shape in mind can sometimes help with the spacing.


Next I used the Champagne ink with another of the large shell stamps.
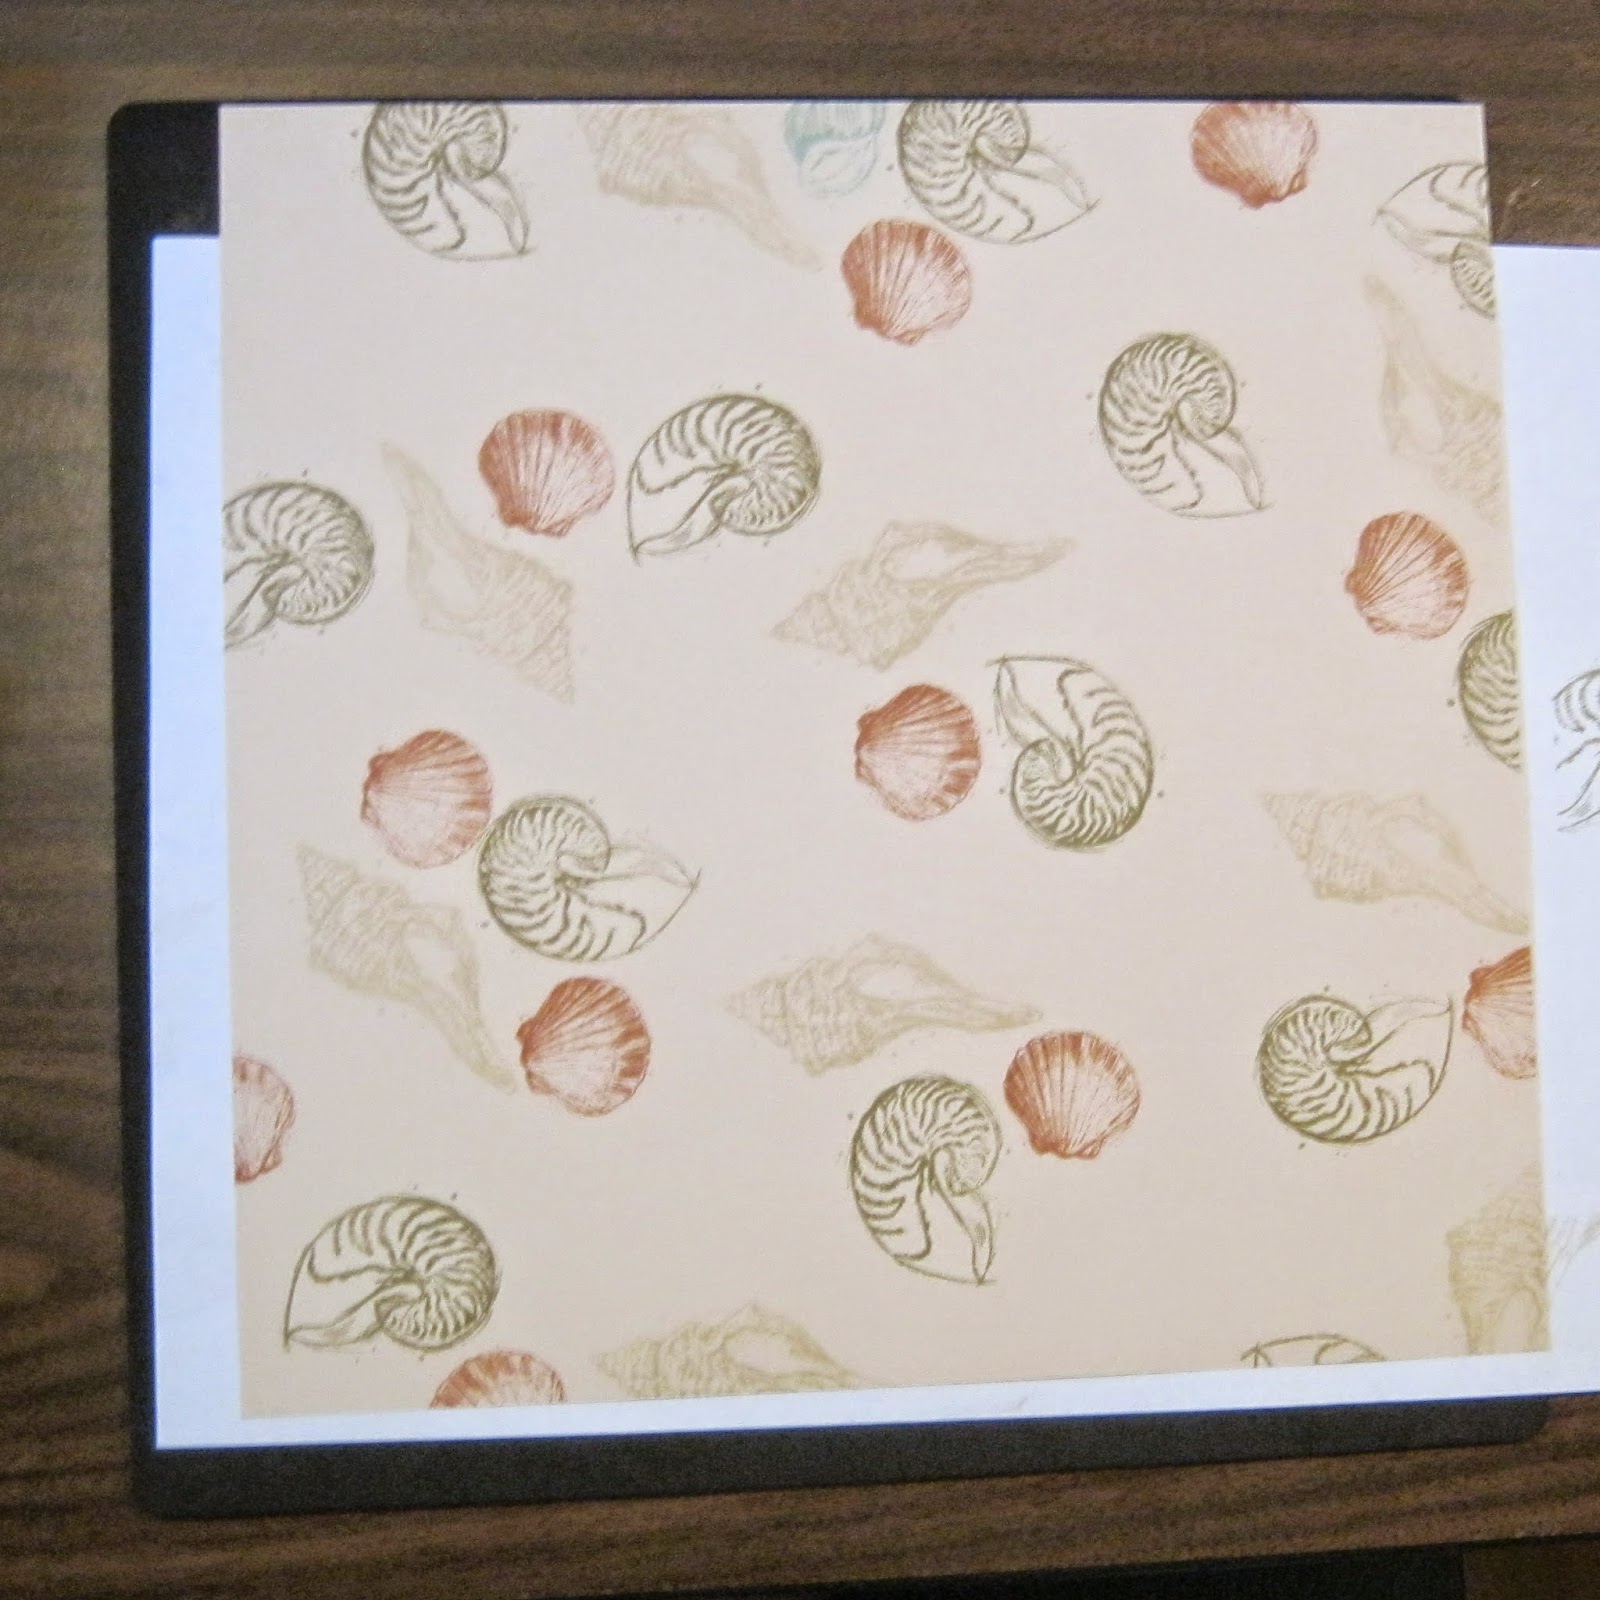

I then used the Sorbet and Glacier Ink with the two small shell stamps to fill in most rest of the background.
I felt that I still had a little more cardstock showing than I would like. I needed an even smaller stamp to complete the page.
I dug through my stash and found these cute little footprints in the retired Surf's Up Scrapbooking Workshop stamp set. The little feet were just the right size. I used all of the ink colours with the footprint stamp and did a second generation stamp (stamping off some of the ink on scrap paper before stamping on project).

Now you have a completely unique piece of patterned paper -
DESIGNED BY YOU!
I hope you will try this technique - pick a stamp set and some ink colours you love and give it a try. You really will be surprised how easy and addictive this is!


.jpg)


